We set off from Port Arthur: my husband, myself, and, of course, the Ancient Marnier. The first part of your Three Capes Track experience is a boat ride from Port Arthur to Denmans Cove. You’ll motor past Crescent Bay (with it’s amazing sand dunes) and Mount Brown, with views of two of the capes. This is a shortened version of the Pennicott Wilderness Journeys’ Tasman Island Cruise. Up close, we saw a seal, sea caves, and an eagle’s nest. Seeing Cape Raoul, Cape Pillar and Tasman Island from the water gave us a sense of their grandeur and a taste of what was to come.
Landing at Denmans Cove is tricky! The boat pulls up to an isolated cove, backs up to the beach, lowers a ramp and then it’s up to you. Time your descent with the receding wave and commit fully to stepping off the ramp and you won’t get your feet wet! Make sure that your bag is strapped to you before you disembark.
Rest on the beach for a while. This is the only beach you’ll stand on until the end of your journey so make the most of it! After a short stop for lunch, my husband was raring to go so off we went! The track start is just up the river a short way and is obvious. Tasmanian artist Alex Miles has designed stunning pieces that introduce you to the start and finish of the track and to each hut. After a snap with the art, move on to the boot-washing station (it’s straightforward and a vital step in stopping the spread of plant diseases). From here, it’s a climb upwards. Not sure why “15 minutes” is engraved on a bench? Read the book that you were given by staff at Port Arthur.
When you reach Surveyors, you won’t believe it. It is superb accommodation. Finely-crafted cabins. A large deck with picture-perfect views of Cape Raoul. Deck chairs (Alex Miles’ designs appear on the fabric). Luxuriously thick mattresses. Drop loos that don’t smell (at least not in Spring-time!). A pellet fire. Bliss! Settle in and enjoy your time in paradise.
Each evening, your lovely host ranger (thanks Will, Ken and Joel!) will give you a weather update. This will help you to plan your day on the Three Capes Track. We decided to walk Days 2 and 3 in one go due to poor weather predicted for Day 3. This was a massive day and resulted in a minor injury for me but the views were amazing!
I really enjoyed the story starters on Day 2. You’ll come across wooden wombat poos, a love-nest in the woods and a beautifully sculpted resting place in Ellarwey Valley. Cloud Forest has an intriguing story and reading it on the spot would be a great idea. Your surroundings are very unique! It’s Spring and I really enjoyed the variety of native flowers on the walk between Surveyors and Munro.
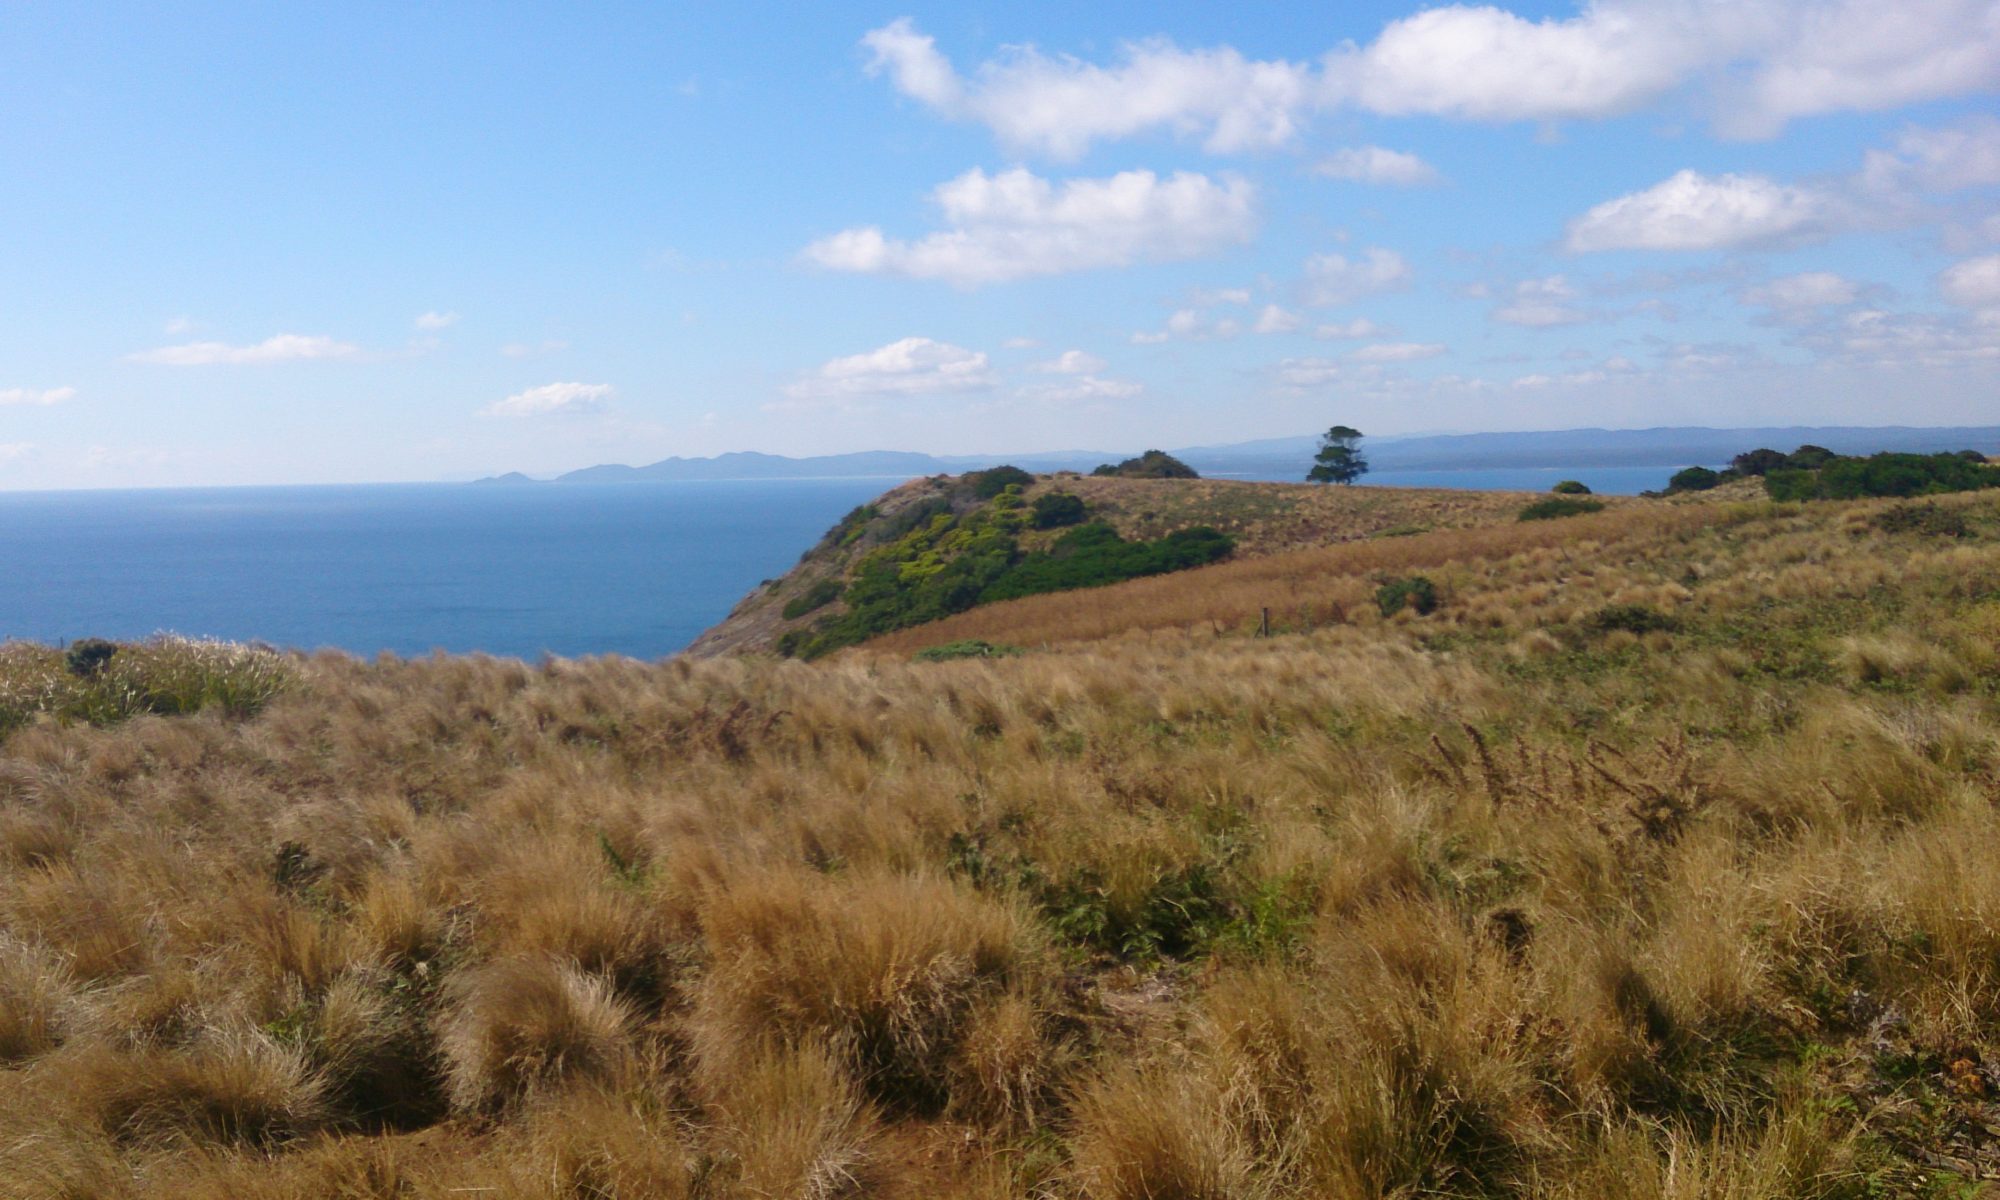
I found Day 2 to be the hardest day of the Three Capes Track experience. Your pack is still laden with food and you have to walk up two steep sections: Arthurs Peak and Crescent Mountain. Going up generally means glorious views though and we were not disappointed! Cape Raoul, Mount Brown and the dunes at Crescent Bay were a lovely sight. The Ancient Mariner also spied our previous night’s accommodation, Surveyors, as well as an additional hut that has been built as part of an upcoming gourmet walking experience.
Words of warning for Day 2 and onwards are that you will pass across helicopter routes and near cliffs. These hazards are clearly signposted, with instructions on what to do if you hear a helicopter and the minimum distance between the track and the cliff’s edge. The good news is that the views (downwards, upwards and across!) are stunning and, when you are standing on the track, you feel quite safe.
When you reach “Four Ways”, as the rangers call it, turn right to Munro, Cape Pillar and The Blade. Have a rest at “High Life” but don’t forget to look up! You may spy an eagle’s nest. Within the hour, you should arrive at Munro, with excellent views from the deck (and helipad) and a welcome hot shower.
As I said in my previous post, we did most of Day 3 of the Three Capes Track (the walk out to Cape Pillar and The Blade) as part of Day 2. We knew that the weather was going to be rotten on our third day. This meant about 7.5 hours of walking in one day and a minor injury for me but the views were worth it! The absolute highlight of this walk is standing atop The Blade, with 360’ views of Cape Raoul, Cape Hauy and Tasman Island, but I’m getting ahead of myself…
Leave your pack at Munro in the “garden variety Garden shed,” as ranger Ken instructed us. This is down the track, just beyond the sleeping quarters. Not having to carry the extra bulk is a huge relief! From here, keep walking “until you can’t walk any further” (again, instructions from Ken!). Take note of your surroundings as you go: Forest, button-grass, cliff’s edge, windswept scrub. Each has its own beauty.
The track on Day 3 is particularly brilliant. See just how big a blue whale is from the markers on the track. Walk along the back of a 2.4km duck-board snake. Spy tiny flowers, hinted at in mosaics. Descend white, wooden steps, curving their way towards The Blade. Step out onto a tarn (small, shallow lake). It’s a very snap-happy day!
Take the time to go out to the “Seal Spa”. The seats are particularly well-formed and the views of Tasman Island are magnificent. You can see parts of the old tramway, the lighthouse and the three houses. The Ancient Mariner spent eight hours becalmed beneath Tasman Island a few years ago. Despite previously saying, “I’ll be happy if I never see that lighthouse again!”, even he lapped up the views!
When you reach the end of the track, keep going at your own risk. Mind you, the steps continue to be well-formed and the views from The Blade are awe-inspiring! There is also a certain kudos to be gained from saying, “I’ve stood there!”. The Ancient Mariner was not inclined to reach the top due to vertigo but eventually made it. His main disappointment is that the photo someone took of him there shows his face… and none of the backdrop! Oh dear! I can assure that he made it to the top!
From The Blade, you’ll back-track back to Munro for a bite to eat, a toilet-stop and a last chance to read the (astonishing!) story of the makers-model of the Nord that is housed within the hut. From here, it’s an hour and a bit to Retakunna, the wildlife paradise (wombats and wallabies!) where you’ll spend your final evening. We arrived to see the helicopter in action – workers being flown in and out.
The entire set-up of the accommodation is first-class. Everything has been thoughtfully crafted, from the helicopter-ready poop pods and gas frames to the sliding doors on the communal huts to the poo facts on the toilet signs. The library in all three huts remains the same (one of our fellow walkers found a minor discrepancy!) so that you can pick up the same book and keep reading when you reach the next hut. It is a bushwalking experience unlike any other!
Your final day on the Three Capes Track sounds daunting. 6 – 7 hours to reach the bus. A very early start. A mountain to climb. Lots and lots of stairs out to Cape Hauy. The easy way out (a two-hour track direct from Retakunna to the carpark at Fortescue Bay) seems like a great option. Unless you are injured, don’t miss out on the last section! It is brilliant!
The track up Mount Fortescue is well-formed and very gentle, considering the height difference between Retakunna and the top of Mount Fortescue. There are three seats to stop at as you journey upwards, rain forest to walk through and, of course, beautiful views from the top. It was quite cloudy when we arrived at the top, exhausted but elated that we had completed the climb in less time than anticipated. The clouds cleared enough for us to see the giant cliffs near Munroe. Spectacular!
Downwards! Your next view is of Cape Hauy and Hippolyte Rocks. After a snap of the Ancient Mariner and Hippolyte Rocks (“I’ve sailed around them!” he says), we head down further. I’d been so relieved to be going down that I went a little too far a little too fast and now have a mega bruise and a sore wrist to remind me that one should always take care on slippery steps! Take your time; the hardest part of your journey is behind you.
Eventually, after more stunning coastal views, including of a small arch at the base of the cliffs, you’ll reach “Only Here”. This story spot is where you’ll leave your pack, thankfully, and head out to Cape Hauy with your daypack. The walk to Cape Hauy can be done as a day walk from Fortescue Bay and is one of Tasmania’s 60 Great Short Walks. Make sure you bring all the essentials: food, water, rainwear, something warm and the first aid kit. If you’re pressed for time, you may need to skip this bit to make it to the bus. This would be very sad indeed!
There are a lot of steps to traverse on your way to the tip of Cape Hauy but, without your pack, this isn’t too much trouble. Besides, you’ll want to have a rest at each peak and trough to again admire the views! We had a relatively clear journey out and magnificent, 360’ views from the platform at the end, including downwards to the Totem Pole and Candlestick (famous to rock climbers). The Ancient Mariner rates these views (from Cape Pillar up to the Forestier Peninsula) as the best on the entire walk! On our return journey, squalls of rain came through and we were grateful for the protective gear.
It’s only a short walk back to Fortescue Bay. We were bemused, as always, by tourists in jeans and t-shirts in the cold and rain!!! If you’re going to visit Tasmania, invest in waterproof pants and jacket. You’ll enjoy our wilderness much more! Fortescue Bay is a wonderful sight, both because it signals the end of your walk and because it is beautiful. White sands and clear waters surrounded by forest… a swim was very tempting, even in Spring!
When booking your Three Capes Track experience, you can choose which bus you catch back to base: 2pm or 4pm. If you get up early and walk at a reasonable pace, you’ll be in time for the 2pm bus. Mind you, in summer, it would be brilliant to have a swim in the pristine waters of Fortescue Bay and take the later bus. If in doubt, book the later bus then ring Pennicott Wilderness Journeys from the pack drop-off spot at Cape Hauy to change your bus time if needed. When you reach Fortescue Bay, keep walking along the dirt road until you reach the bus shelter (there’s a kiosk nearby, open until 4pm most days).
When I told my grandfather that we’d completed the Three Capes Track, he said, “You must be pleased with yourselves!” We are! Though quite sore, we have been to an incredible part of the world. We have walked 46km, stood atop The Blade, climbed Mount Fortescue and seen the views from Cape Hauy. What a grand adventure!
The Tasman Peninsula is a very unique part of Tasmania. It has played a very significant role in the state due to its tragic history and its natural beauty. Today, I had the privilege of admiring some of the latter: Tasmans Arch, Devil’s Kitchen and The Blowhole. What do they all have in common? They all were once sea caves and they are all very close to one another.
A sea cave that has lost most of its roof, Tasmans Arch is remarkable. Why visit? It’s beautiful! I enjoyed admiring the arch from the viewing platform near the carpark. Little did I know that you can also walk across it! How wonderful! You don’t even realise that you’re walking across it as it feels like any other part of the path! On the other side of the arch is a lookout that gives stunning views of the coastline.
Devil’s Kitchen is no longer a cave as it has lost its entire roof. Here you can see stunning rock formations, the surging sea and a shelf of rock that resembles the nearby Tessellated Pavement. Make sure that you have a look from both vantage points as they offer two very different views.
On the other side of Doo Town, facing onto Pirate’s Bay, is The Blowhole. I haven’t seen a blowhole like it before! Behind the sea cave, the blowhole is exposed. You can walk around the rock pool, viewing the blowhole’s activity from a variety of angles. The seas weren’t high when we were there but it was still impressive.
While you’re at The Blowhole, take in the views from the nearby lookout. There is a stunning outlook onto Pirate’s Bay. I also enjoyed watching the waves crash against the cliffs from another vantage point. There are more unusual siltstone formations to admire as well as a nearby jetty for those who would prefer to cast a line.
You’ll find Tasmans Arch, Devil’s Kitchen and The Blowhole at the southern end of the Eaglehawk Neck isthmus. Just turn left, drive for four kilometres and you’ll be in Doo Town. After admiring the many “doo” themed shacks, follow the signs either to The Blowhole or to the other two sites. There is no need to drive your car between Tasmans Arch and Devil’s Kitchen – simply walk the gravel loop track.
There is no cost to visit Tasmans Arch, Devil’s Kitchen and The Blowhole. If you’re feeling peckish, there is a food van at The Blowhole or a café a short distance from Doo Town. Toilets are located near the jetty. Please respect our environment by taking your rubbish with you, including food scraps. Our wallabies suffer from lumpy jaw if they eat processed food.
Enjoy your trip to a very special and scenic part of Tasmania! For more things to do in southern Tasmania, click here.
Ben Lomond in winter. Skiing. As my husband says, it’s “an adventure”! I may be slightly traumatised from my first ride on a T-Bar lift, from losing a ski on a black slope (we were crossing it to bluer or greener pastures!) and falling off one of the Poma lifts, but I still highly recommend a trip to Ben Lomond in winter. Why?! Read on.
Firstly, your ascent to the mountain is horrifyingly spectacular. Horrifying? If you don’t have your own chains, you’re in a beaten up, mud-caked LandCruiser with no seatbelts on Jacob’s Ladder, which is a very tricky piece of road. Spectacular? Look at the stacks of rock rising on either side of you! Look at the view!!! It was so breathtaking that I didn’t even worry about the crazy road.
Secondly, I saw wallabies in the snow! There were at least three of them. What an unexpected sight! Remember not to feed native animals (even if they do look cold and hungry!) as processed foods can give wallabies lumpy jaw which is an awful disease. I enjoyed photographing them from a distance.
Thirdly, the “adventurous” conditions are strangely comforting. The lifts that break down, strange bumps on the Poma tracks, rocks everywhere, people in hodgepodge clothing (including one of my workmates in his ex-postman one-piece!) and so on only add to the fun.
If you’re looking for a family day out, there is a roped off area just for tobogganing. Forgot the toboggan? You can hire a toboggan and skiing or snowboarding gear on the mountain. Warm up in the café with hot food and drinks or in the public shelter next to the log fire. Don’t know how to ski yet? Book a group beginner’s lesson with Ben Lomond Snow Sports School at 10am or 12noon or a private lesson at 12:30pm. Make sure that you book your lesson the day before you visit the mountain.
Finally, you’ll find lots of lovely locals at Ben Lomond in winter. Thanks to the ranger who greeted us. Thank you to to the shoe-fitter, who got my boot size just right. Thanks to the skier, who gave us great tips. Many thanks to the lady who rescued my ski!!! It would have been a long hobble across the slope without it!
Ben Lomond is about an hour’s drive from Launceston via St Leonards. Follow signs for Ben Lomond National Park. There are a few kilometres of gravel road to drive on when you reach the park. A ranger will greet you and you’ll need to pay for your entry to the park if you don’t already have a Parks Pass. Unless you have snow chains, you’ll need to park your car and take the shuttle to the top. Chains, fuel and parks passes can all be purchased/hired in Launceston or Hobart. You won’t find fuel for sale or chains for hire on the mountain though.
The cost for a one-day Parks Pass for one vehicle is $24 or you can purchase a holiday pass for $60. If you purchase your pass at Ben Lomond, you’ll need correct change. An additional $15 per person will see you shuttled up to the snow. You can hire gear at reasonable prices. If you arrive later in the day, gear hire and lift passes are cheaper but you will be left with the scraps when it comes to gear. Lift passes are $70 per adult per day or $45 after 12:30pm. All this is worth it, for the adventure that is Ben Lomond in winter.
On your way to or from Ben Lomond, why not stop at Corra Linn? Staying a while? Read more about my adventures in Tasmania’s north and midlands.